Get started
You need a Mac or a Linux machine, Docker Desktop running, and a free Cloudflare login the first time it starts — that's the list. Nothing to sign up for beyond that, no keys to paste. Pick whichever of the three paths below suits you; they all end in your browser, signed in as the owner of a demo organisation.
Three ways in
Run one script, ask your coding agent, or do each step yourself. Same result, your choice of company.
One command
The installer clones, detaches the kit's history so the copy is yours from the first commit, and runs the bootstrap — one line per step, then your browser opens signed in. Read it first — it is short.
curl -fsSL https://rocketflare.dev/install.sh | bash -s -- myapp1/10 toolchain2/10 install3/10 secrets4/10 database5/10 migrate6/10 plugins installed analytics; tables generated and migrated7/10 seed8/10 cloudflare9/10 cli10/10 runready http://localhost:3000/login?as=owner%40example.testOr clone it yourself
The same thing in three commands, if you would rather see each one. The second is what
makes the copy yours: the kit is a template, not an upstream, so its history goes and
yours starts at commit one. Re-running the bootstrap after a fix is always safe
(pnpm bootstrap once dependencies exist).
git clone --depth 1 https://github.com/rocketflare-dev/rocketflare.git myapp && cd myapprm -rf .git && git init -q && git add -A && git commit -qm "Start from Rocketflare"bash scripts/bootstrap.sh--offline | No Cloudflare account: turns the Workers AI binding off in both wrangler files. Chat, agents and embeddings then need a key or a tenant provider. |
|---|---|
--no-demo | Seed the organisation and accounts, but no demo data. |
--no-dev | Stop after step 8 and print the commands to run next. |
--check | Read-only preflight (the same as pnpm preflight): toolchain, secrets, database, Cloudflare, dev status. |
Ask your agent
1 Install Claude Code, clone the repository and open the folder in it.
git clone --depth 1 https://github.com/rocketflare-dev/rocketflare.git myapp && cd myapprm -rf .git && git init -q && git add -A && git commit -qm "Start from Rocketflare"claude 2 Type /rf-setup — or just ask it to set the project up. The skill runs
the same script as the other two paths and narrates it.
- You
/rf-setup
- Claude Code
Running the first-run script and explaining each line as it lands. It will fix anything missing — Docker, Node 24, pnpm — and ask whether to log in to Cloudflare or stay offline.
- Checked Node 24, pnpm and Docker, and installed what was missing
- Installed the dependencies
- Wrote the local secrets file with a fresh encryption key
- Started Postgres in Docker
- Created the database schema
- Installed the default plugins — analytics, so you get dashboards on the first run
- Seeded a demo organisation with people, documents and activity
- Checked the free Cloudflare login the built-in AI needs (or turned that off with --offline)
- Signed the command-line tool in
- Started the app on :3000 and the API on :3001
- Claude Code
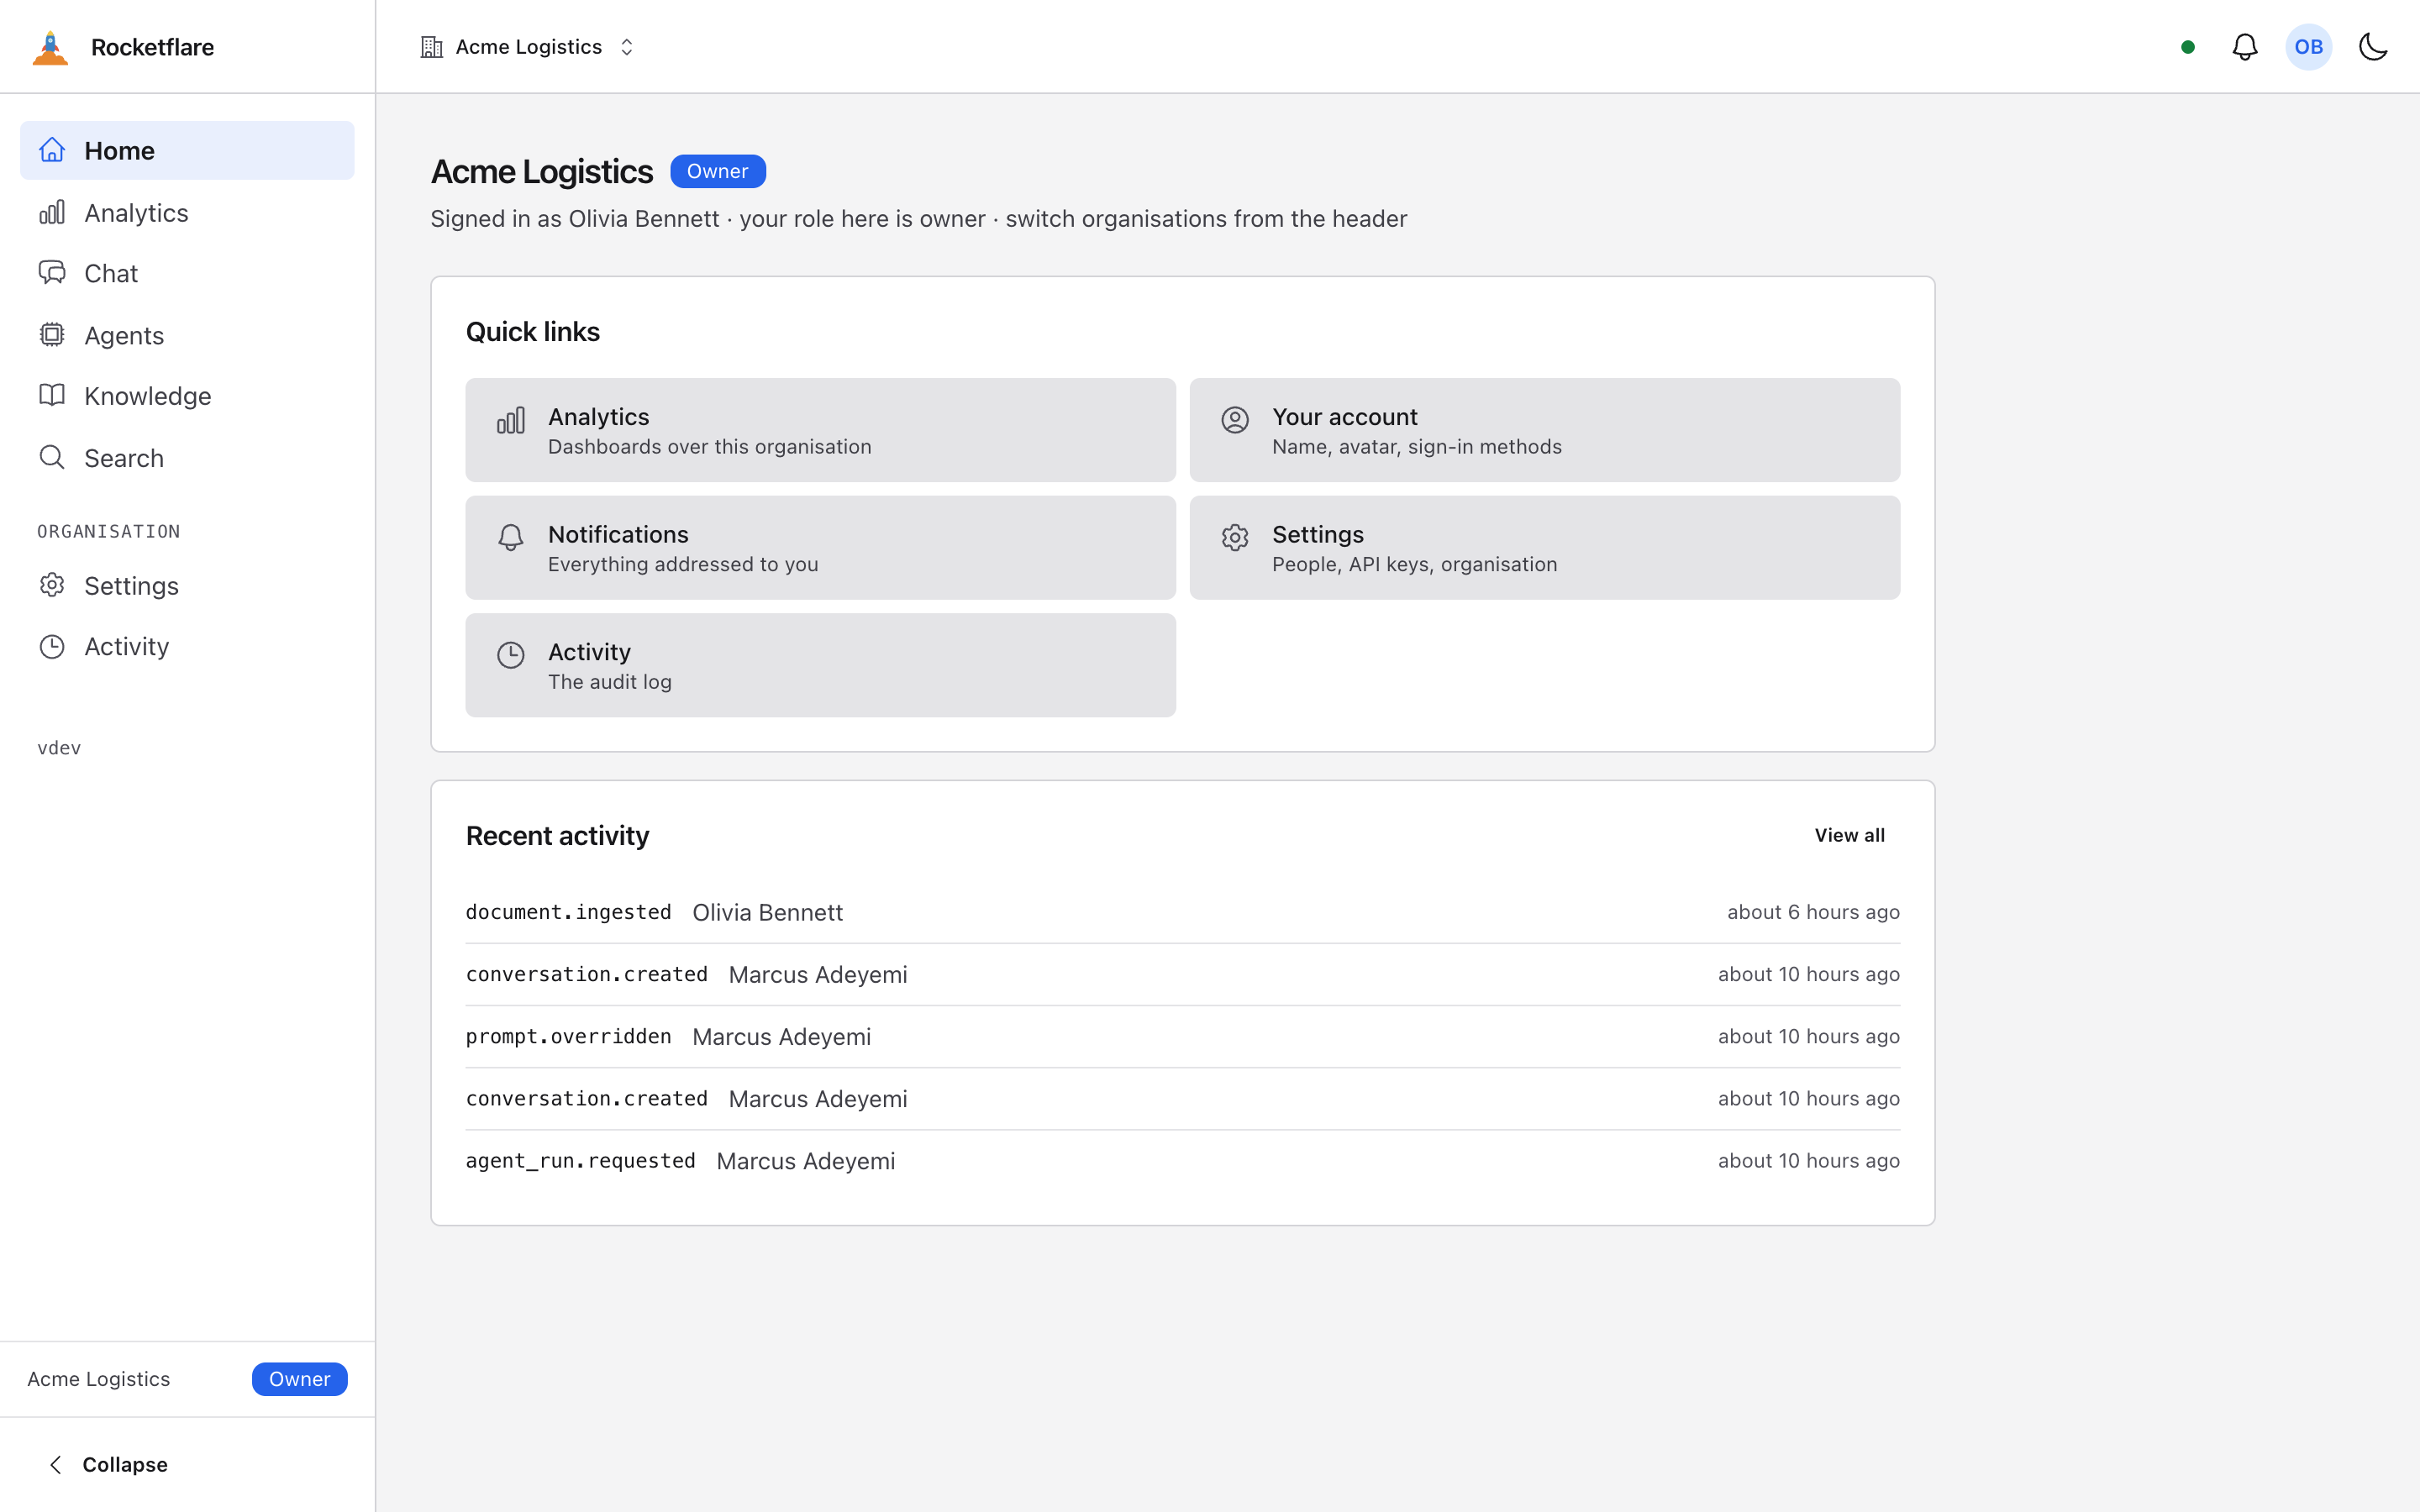
Opened http://localhost:3000. You're signed in as Olivia Bennett, owner of Acme Logistics. Try Chat, Agents, Knowledge or Analytics.
Then /rf-adapt <slug> "Your App" renames everything — package names, the Worker, the
database, the command-line tool, the theme — and /rf-provision deploys
it (below). /rf-upgrade ports later kit releases
in, and /rf-plugin installs, upgrades or removes a
plugin — the published ones are in the
catalogue.
By hand
The bootstrap, unrolled. This is SETUP.md Part 1; every step ends in the line that proves it worked, and the next step waits until you have seen it.
git clone --depth 1 https://github.com/rocketflare-dev/rocketflare.git myapp && cd myapprm -rf .git && git init -q && git add -A && git commit -qm "Start from Rocketflare"- Install
corepack enable && pnpm install
Verify: pnpm -v prints 10.x and the install exits 0. - Local secrets
cp apps/web/.dev.vars.example apps/web/.dev.varsopenssl rand -hex 32
Paste the random value as OAUTH_ENCRYPTION_KEY in apps/web/.dev.vars. Leave every optional key blank.
Verify: The OAUTH_ENCRYPTION_KEY line has a 64-character value. - Database
pnpm dev:db:up && pnpm db:migrate
Verify: It ends with the number of migrations applied and no error. - Demo data
pnpm seed --demo
Verify: It lists the seeded accounts (owner@example.test among them) and prints one API key. - Run it
pnpm dev
Verify: Both servers report ready and http://localhost:3000 shows the sign-in page. - Sign in
Open http://localhost:3000. Press the Owner quick-login button, or enter owner@example.test and open the magic link printed in the terminal (no email provider is configured, so links are logged, not sent).
Verify: You land on Home as Olivia Bennett, owner of Acme Logistics. - The command line
pnpm cli login --server http://localhost:3001pnpm cli whoami
Verify: whoami prints your email, the organisation and a key prefix. - Tests
pnpm gate
Verify: Lint, typecheck, test and build all pass. The test step starts its own database and ends with the driver conformance pass under Neon.
What just happened
Whichever path you took, this is now true on your machine.
- Postgres in Docker
One container on port 5432, with the vector extension for search.
- Schema migrated
Every table, with the row-level policies in place but not yet enforced.
- Demo organisation seeded
Acme Logistics: people with roles, documents, chats and a dashboard.
- App on :3000, API on :3001
The interface and the Worker, each reloading as you edit.
- You, signed in as the owner
Olivia Bennett (owner@example.test) — the dev quick-login, which does not exist when deployed.
Deploy it
Three accounts you create yourself, one domain, one command. The kit can create projects, databases and DNS records inside your accounts — it cannot create the accounts.
Before anything: three accounts
- 1 Cloudflare runs the app · Workers Paid — Workflows (and Hyperdrive, if you use it) need it
Create the account and put it on Workers Paid. Then add the domain you want the app on — register it there, or move its DNS there — because the app’s hostnames and the email DNS records are created in that zone. No domain yet? Staging gets a workers.dev address and email is skipped.
Read by the kit as
CLOUDFLARE_API_TOKENCLOUDFLARE_ACCOUNT_ID— your account id is in the right-hand column of the Workers & Pages overview - 2 Neon hosts the Postgres database
Create the account. The free tier is enough for the two branches the kit makes.
Read by the kit as
NEON_API_KEY - 3 Resend sends the sign-in and invitation emails · optional — skip it with --skip-email and links are logged instead
Create the account. You will verify the same domain here; the free tier is enough.
Read by the kit as
RESEND_API_KEY
Then hand the tokens to the kit — once, in your own terminal
pnpm provision tokens asks for each token with hidden input, checks it against
the service, and writes apps/web/.provision.env (git-ignored, readable only by you).
Nothing is pasted into a chat. In CI, export the same variables instead — they take precedence.
pnpm provision tokensCLOUDFLARE_API_TOKEN paste (hidden) → checkedCLOUDFLARE_ACCOUNT_ID paste (hidden) → checkedNEON_API_KEY paste (hidden) → checkedRESEND_API_KEY paste (hidden) → checked- You
/rf-provision
- Claude Code
Tokens found in apps/web/.provision.env. Running the phases in order — each one ends in a Verify: line I'll show you, and I stop at the first that fails:
- preflight — checks the tokens, the tools, the accounts, and that your domain is on Cloudflare
- email create — creates the sending domain on Resend and its DNS records on Cloudflare
- neon — creates the Neon project with a staging branch
- cloudflare — creates KV, the queue and the R2 bucket (and Hyperdrive, for the postgres driver), and writes their ids into both wrangler files
- migrate — runs the migrations on each branch
- github — sets the GitHub environment secrets
- urls — sets the app URL and routes in each wrangler file
- deploy staging — deploys staging and checks it answers
- secrets — sets the Worker secrets, over stdin, never on disk
- email verify — verifies the domain and mints the sending key
- Claude Code
Verify: staging answers at its /api/health with status ok, and the sending domain is verified. Publish a GitHub release when you want production.
Without an agent, the same thing is pnpm provision all (add
--skip-email when there is no Resend account). It creates the
Neon project and its staging branch; KV, the queue and the R2 bucket (plus Hyperdrive if you
choose the postgres driver); writes the
ids into both wrangler files; runs the migrations; sets the GitHub environment secrets;
deploys staging; sets the Worker secrets over stdin; and creates and verifies the Resend
domain with its DNS records on Cloudflare. The step-by-step manual path is
SETUP.md Part 3.
Honest notes
Four things that are true and worth knowing before you start.
Then make it yours
A fresh copy is still called Rocketflare in a few dozen places — package names, the Worker,
the database, the command-line tool, the theme colours, the email sender.
/rf-adapt <slug> "Your App" renames the mechanical ones in one reviewable commit and walks
you through the handful that need a person. The same list, for doing it by hand, is
docs/ADAPTING.md.
After that, the kit is your app. The command-line tool speaks to it at
http://localhost:3001 while you develop and at your own host once deployed.
Staying current
Your copy has no upstream — you will rename, delete and rewrite freely, and you never merge
from us. That does not mean you are stuck on the version you copied. A file at the root,
.rocketflare.json, records which release you came from, the names you renamed
to, and which of the kit's replaceable parts you still have. Run
/rf-upgrade (or pnpm kit:upgrade --apply) and it fetches the kit,
rewrites its changes into your names, and hands you the ones that still apply.
The part that makes this safe is what it refuses to do. Delete the example agent, the
reference plugin or the command-line commands you did not want — or add a
plugin, which is a repository copied in rather than a package
installed — and an upgrade will never bring back what you removed, nor touch a file a
plugin owns. It leaves your database migrations, your Cloudflare configuration and your
version number alone, and tells you what it left for you. Every release ships a note in
docs/upgrades/ saying what changed and how to port it; the
changelog is the list.
One thing to know: keep .rocketflare.json. Deleting it is the only way to
lose the upgrade path.